STEP ONE
- Download & install the fonts from the FONTLIST file provided with your order.
- Open Photoshop!
- Click FILE > OPEN and navigate to the template you saved and then CLICK > OPEN.
STEP TWO – OPEN PHOTO
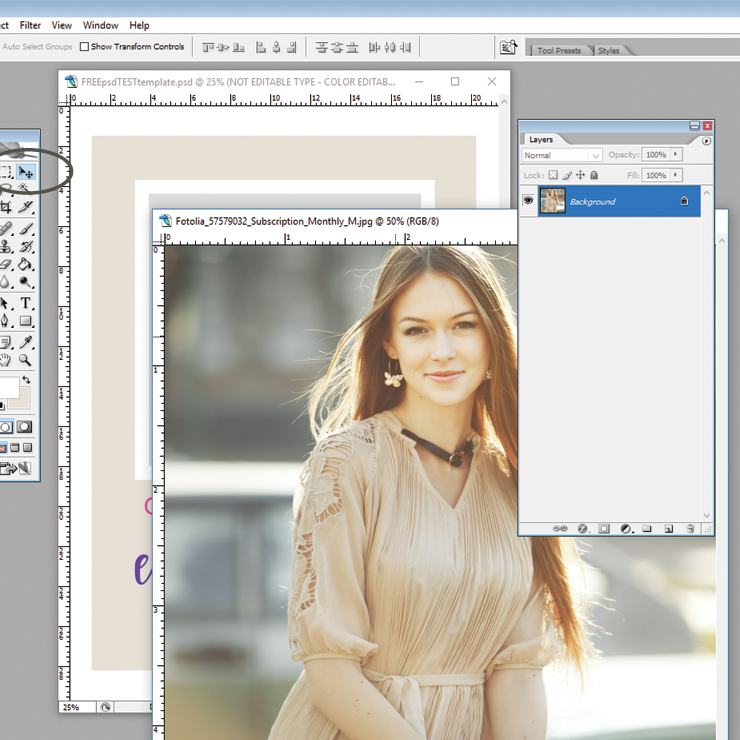
Now it’s time to add your photo to the template. CLICK FILE > OPEN and navigate to the photo that you would like to use and then CLICK > OPEN. Your window should now feature both the template AND the photo you have chosen.
With the photo layer selected in the layers palette and the Move Tool selected via the far left tools menu, HOLD DOWN > CTRL on your keyboard, then (while still holding CTRL) right click and drag the photo over to the template file.
STEP THREE – POSITION PHOTO LAYER
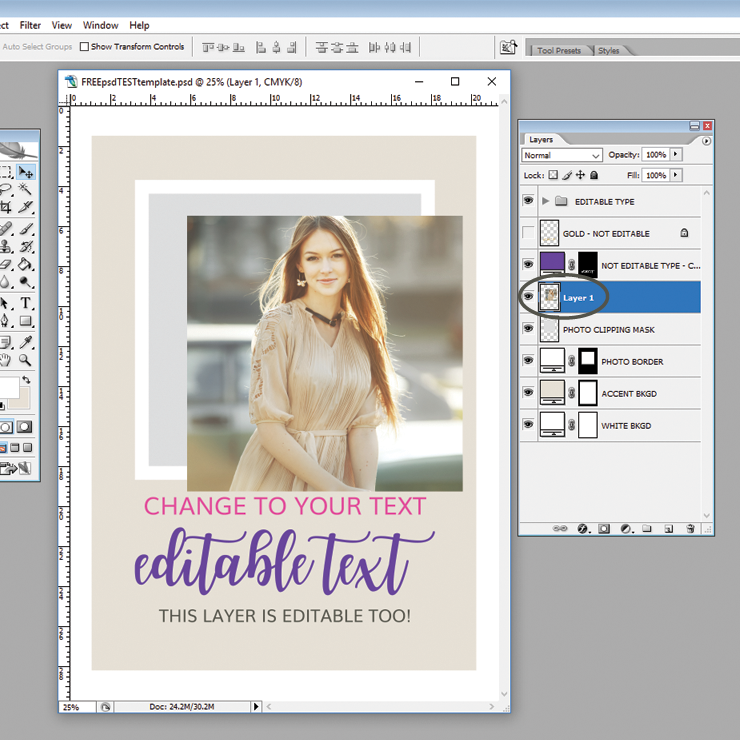
Your photo is now within the template as it’s own layer. In order to create a clipping mask, MOVE or DRAG the photo layer directly above the layer labeled PHOTO CLIPPING MASK. The photo layer MUST placed above the clipping mask layer that you want to use.
STEP FOUR – CLIP THE PHOTO
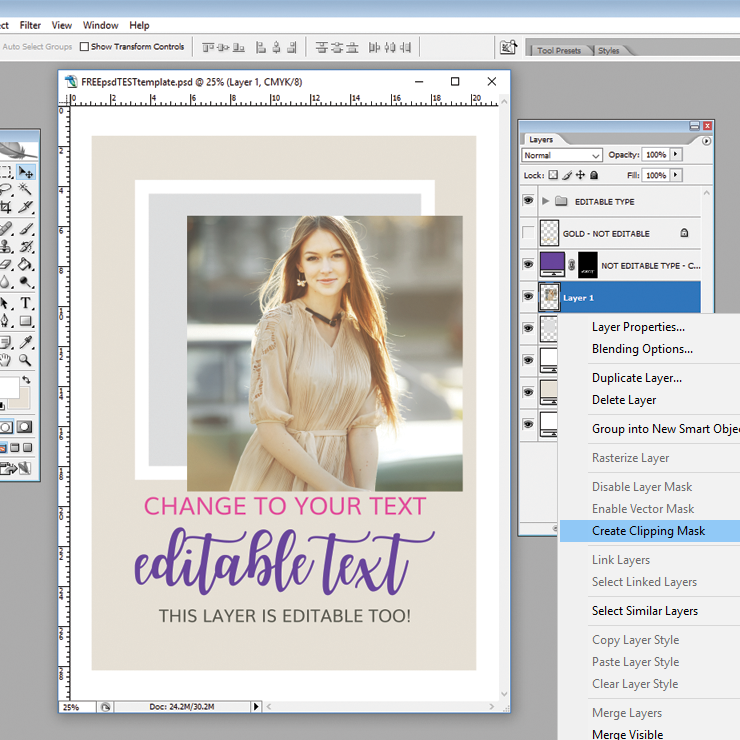
Now that you have your photo placed above the layer PHOTO CLIPPING MASK, you will need to select the photo layer and then RIGHT CLICK the layer. A drop down box will appear. Scroll down to CREATE CLIPPING MASK and RIGHT CLICK it.
Some buyers have to select the layer and then use CTRL + G to make the mask OR go to main menu LAYER < CREATE CLIPPING MASK.
THIS STEP MAY BE a little DIFFERENT IN YOUR VERSION OF PHOTOSHOP OR ELEMENTS. My instructions are for MY version of Photoshop.
If your program does not follow along with my tutorial exactly, YOU will need to do a google search for something similar to “How to use a Clipping Mask in (insert your version of photoshop here)” and there will likely be someone who has posted specific instructions for your version of software.
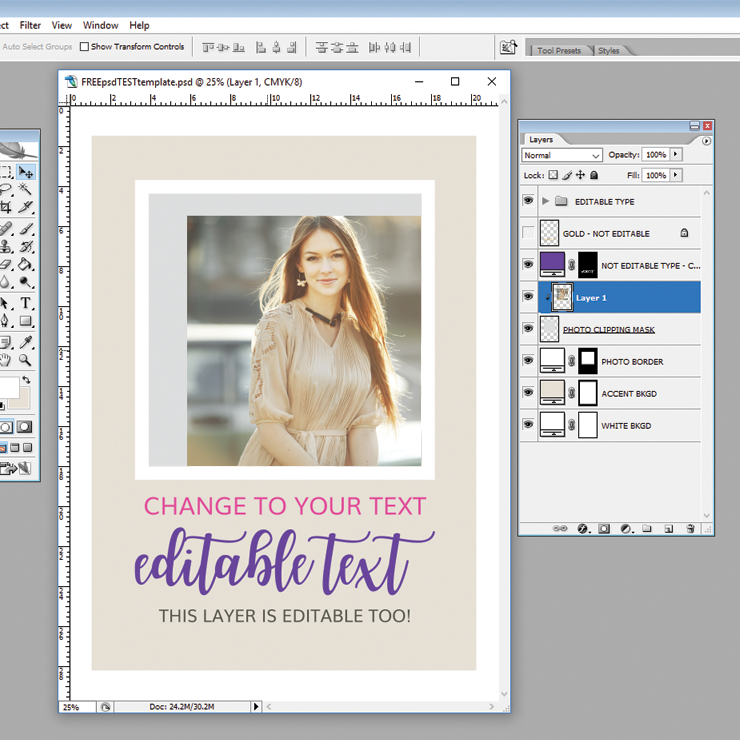
You will now see that your photo has been placed within the clipping mask.
STEP FIVE
Now that your photo has been clipped, you can move it around and resize it within the clipping mask to your liking. To move and resize, keep the layer selected, then click CTRL + T (at the same time) and the bounding box will appear. Use your RIGHT CLICK to move the photo around within the box.
To scale the photo, you will need to hover over corner box, hold your SHIFT KEY down and pull in or out. This may take some practice!
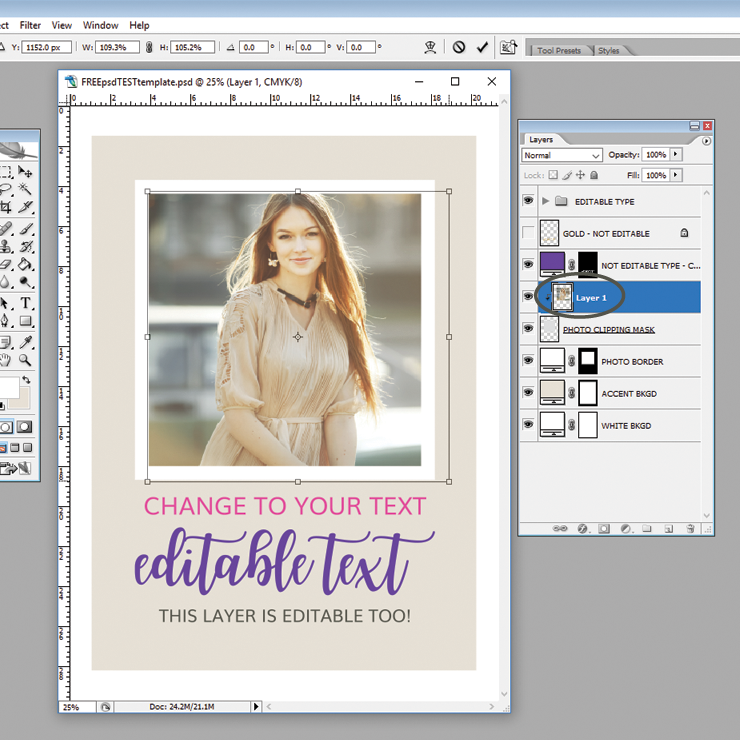
Once you are happy with your photo scale and placement CLICK ENTER which will place and deselect the layer – see below.
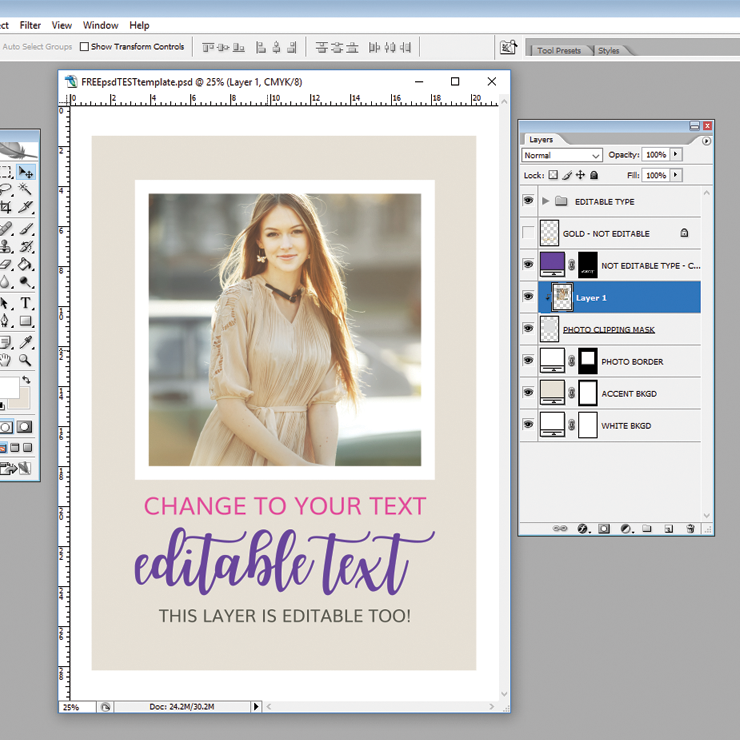
STEP SIX
Repeat the steps above for all of the photo layers within your purchased template.
NEXT TUTORIAL: PSD Saving Your File for Print
Thank you for your business!
![]()