STEP ONE
- Download & install the fonts from the FONTLIST file provided with your order.
- Open Photoshop!
- Click FILE > OPEN and navigate to the template you saved and then CLICK > OPEN.
STEP TWO
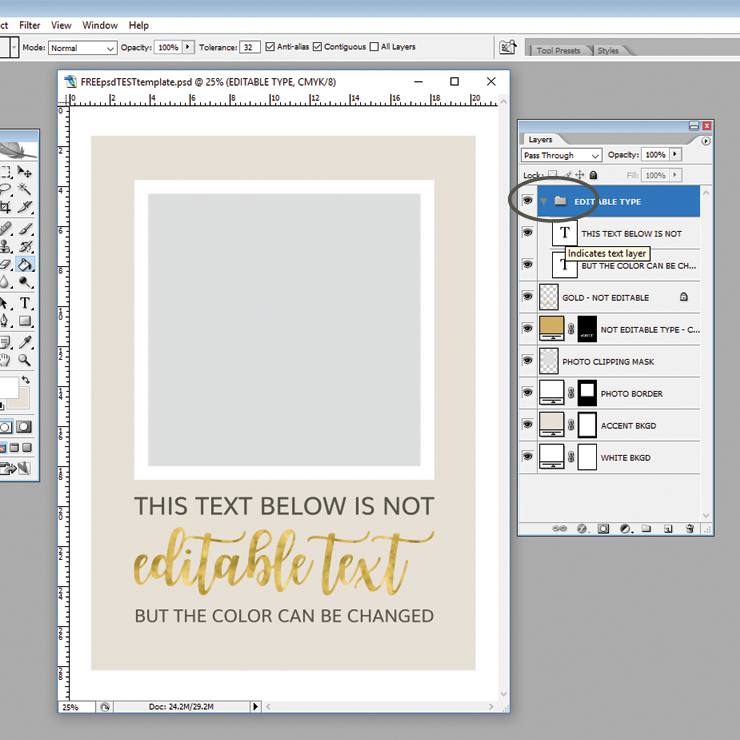
When one of my templates has quite a few text layers, I will group all of the layers into a folder for easier navigation. If your template has a folder that says TEXT or EDITABLE TYPE, just hit the tiny arrow next to the folder and the type layers will drop down so that you can edit them individually.

STEP THREE
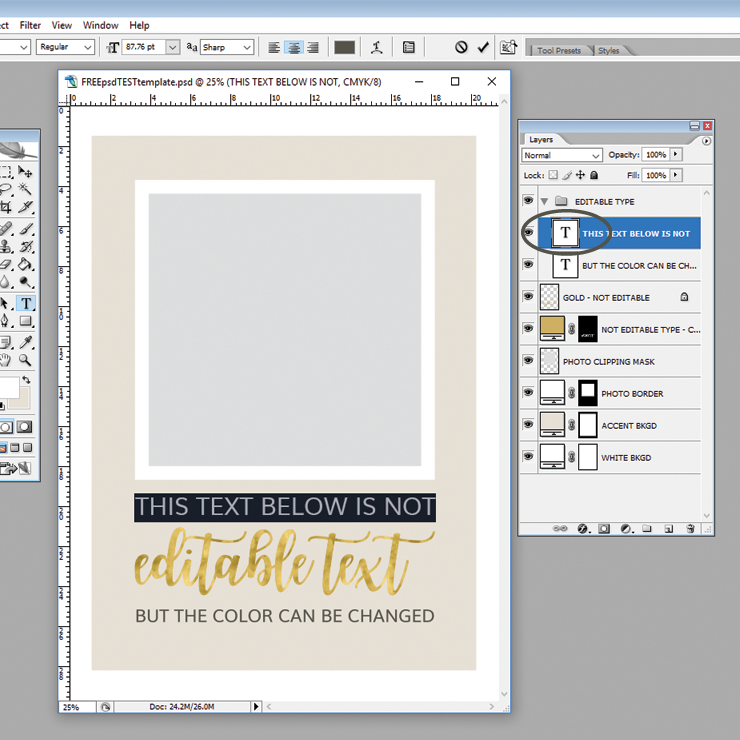
To edit an individual type layer DOUBLE CLICK on the “T” icon for that layer and the type for that layer will become highlighted.

STEP FOUR
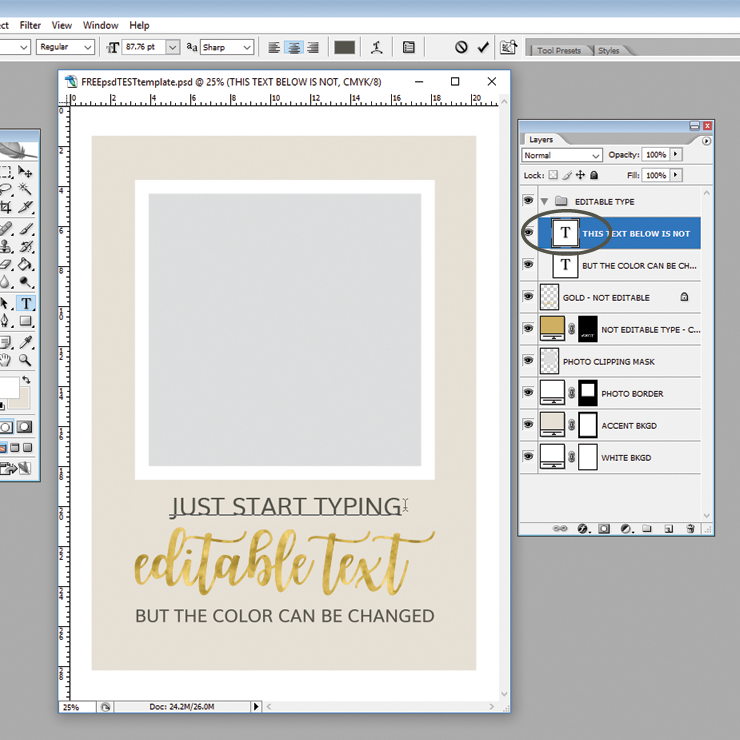
With the text highlighted, just START TYPING and your text will replace the current text. Once you have COMPLETED typing in your text, simply select another layer in your layer window and the text layer you were working on will become deselected.
(NOTE: If you want to edit a partial line of type, DOUBLE CLICK on the “T” icon, then move your mouse curser just behind the specific word(s) you want to edit. DRAG the curser backwards over the specific words that you want to edit (to highlight them) and start typing.

STEP FIVE
Repeat the steps above for all of the type layers that are editable text with your purchased template.
NEXT TUTORIAL: PSD Updating the Color of Your Text
Thank you for your business!
![]()