STEP ONE
- Download & install the fonts from the FONTLIST file provided with your order.
- Open Photoshop!
- Click FILE > OPEN and navigate to the template you saved and then CLICK > OPEN.
STEP TWO
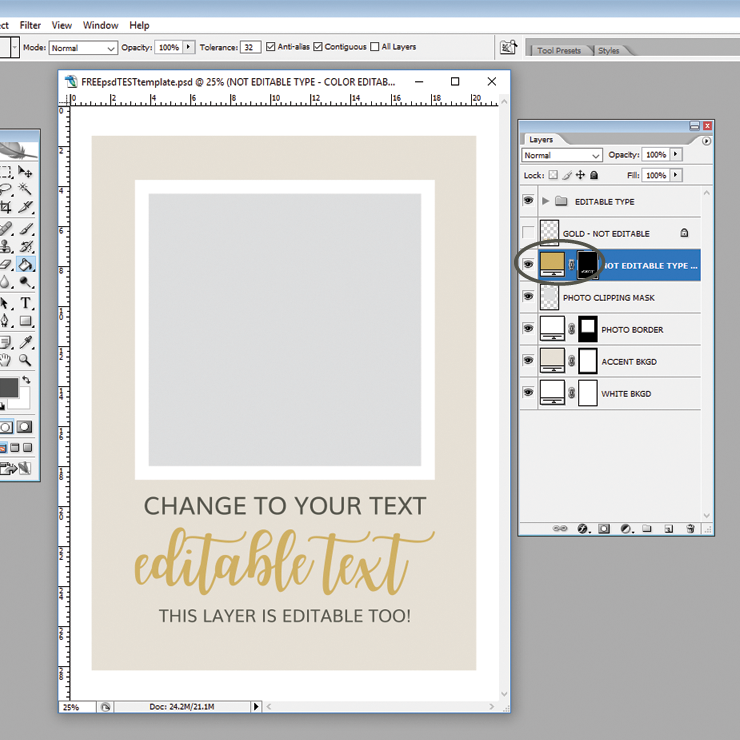
To allow for the most flexibility, most of the design elements, flattened type, accents and icons that are featured in our templates are color editable. This allows you to personalize your template to coordinate with your photo colors or personal style.
Layers that allow for color changes feature an icon that is a color filled box on the very left of the layer.

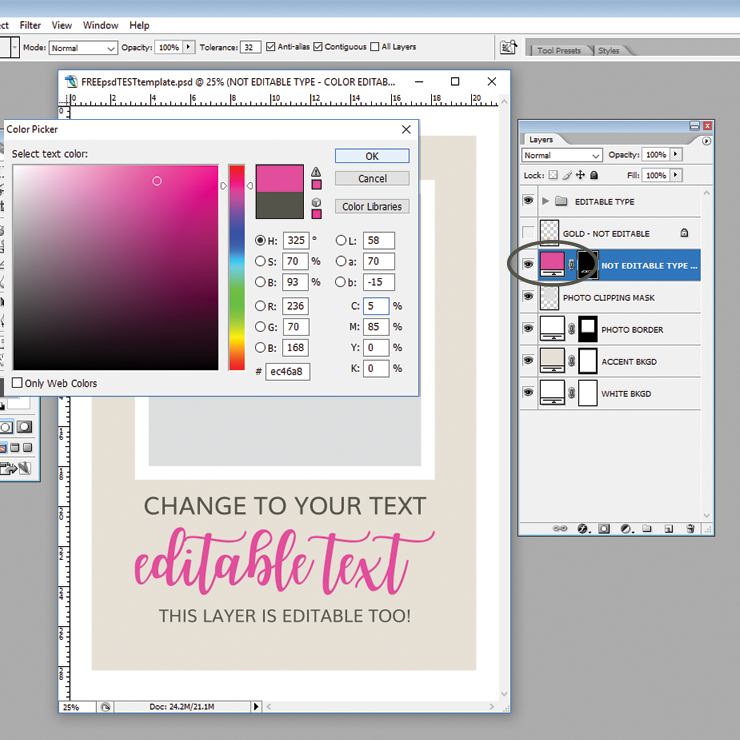
To change the color of an editable element layer, DOUBLE CLICK on the colored box on the individual layer you want to edit and the COLOR PICKER will appear. You can use your mouse to click anywhere in the large box of color to select a color there OR click within the rainbow bar next to the big color box and more color options will appear. To enter a specific color number, use the RGB boxes or the # box at the bottom. CLICK OK and the new color will be applied.

NOTE: GOLD ELEMENT LAYERS
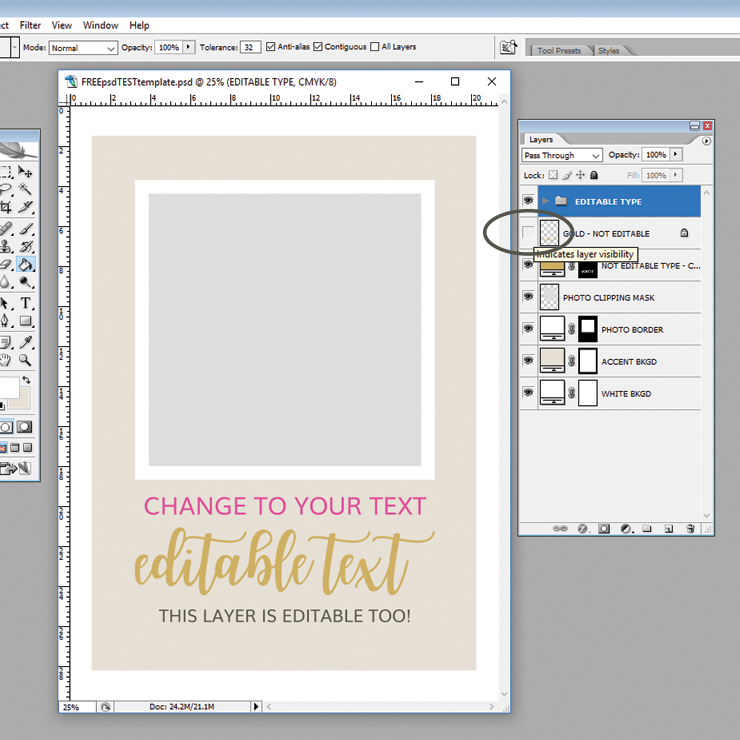
The gold layers within our templates are not directly editable, due to licensing restrictions, but a color editable layer of the EXACT SAME element or flattened text will be located directly below the non-editable gold layer.
If you would like to use another color, rather than the gold, simply turn OFF the gold layer, by CLICKING the eye on the far left of the layer. Then go to the layer directly below the gold layer, turn “ON” that layer, by CLICKING the eye on the far left of the layer. Continue using the directions in STEP TWO above.


STEP THREE
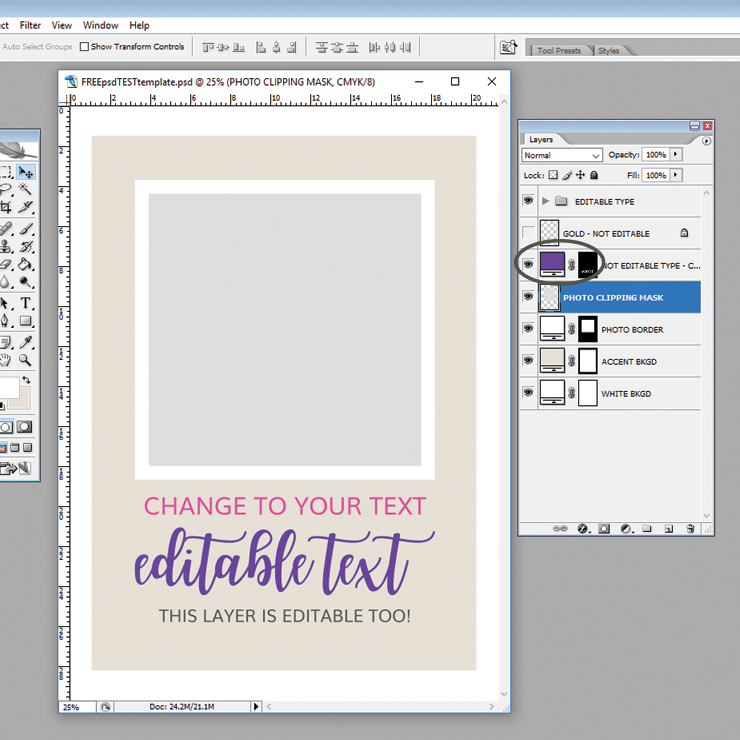
Repeat the steps above for all of the editable color element layers that you would like to change.
NEXT TUTORIAL: Using Photo Clipping Masks
Thank you for your business!
![]()